Which Laravel authentication package to choose?
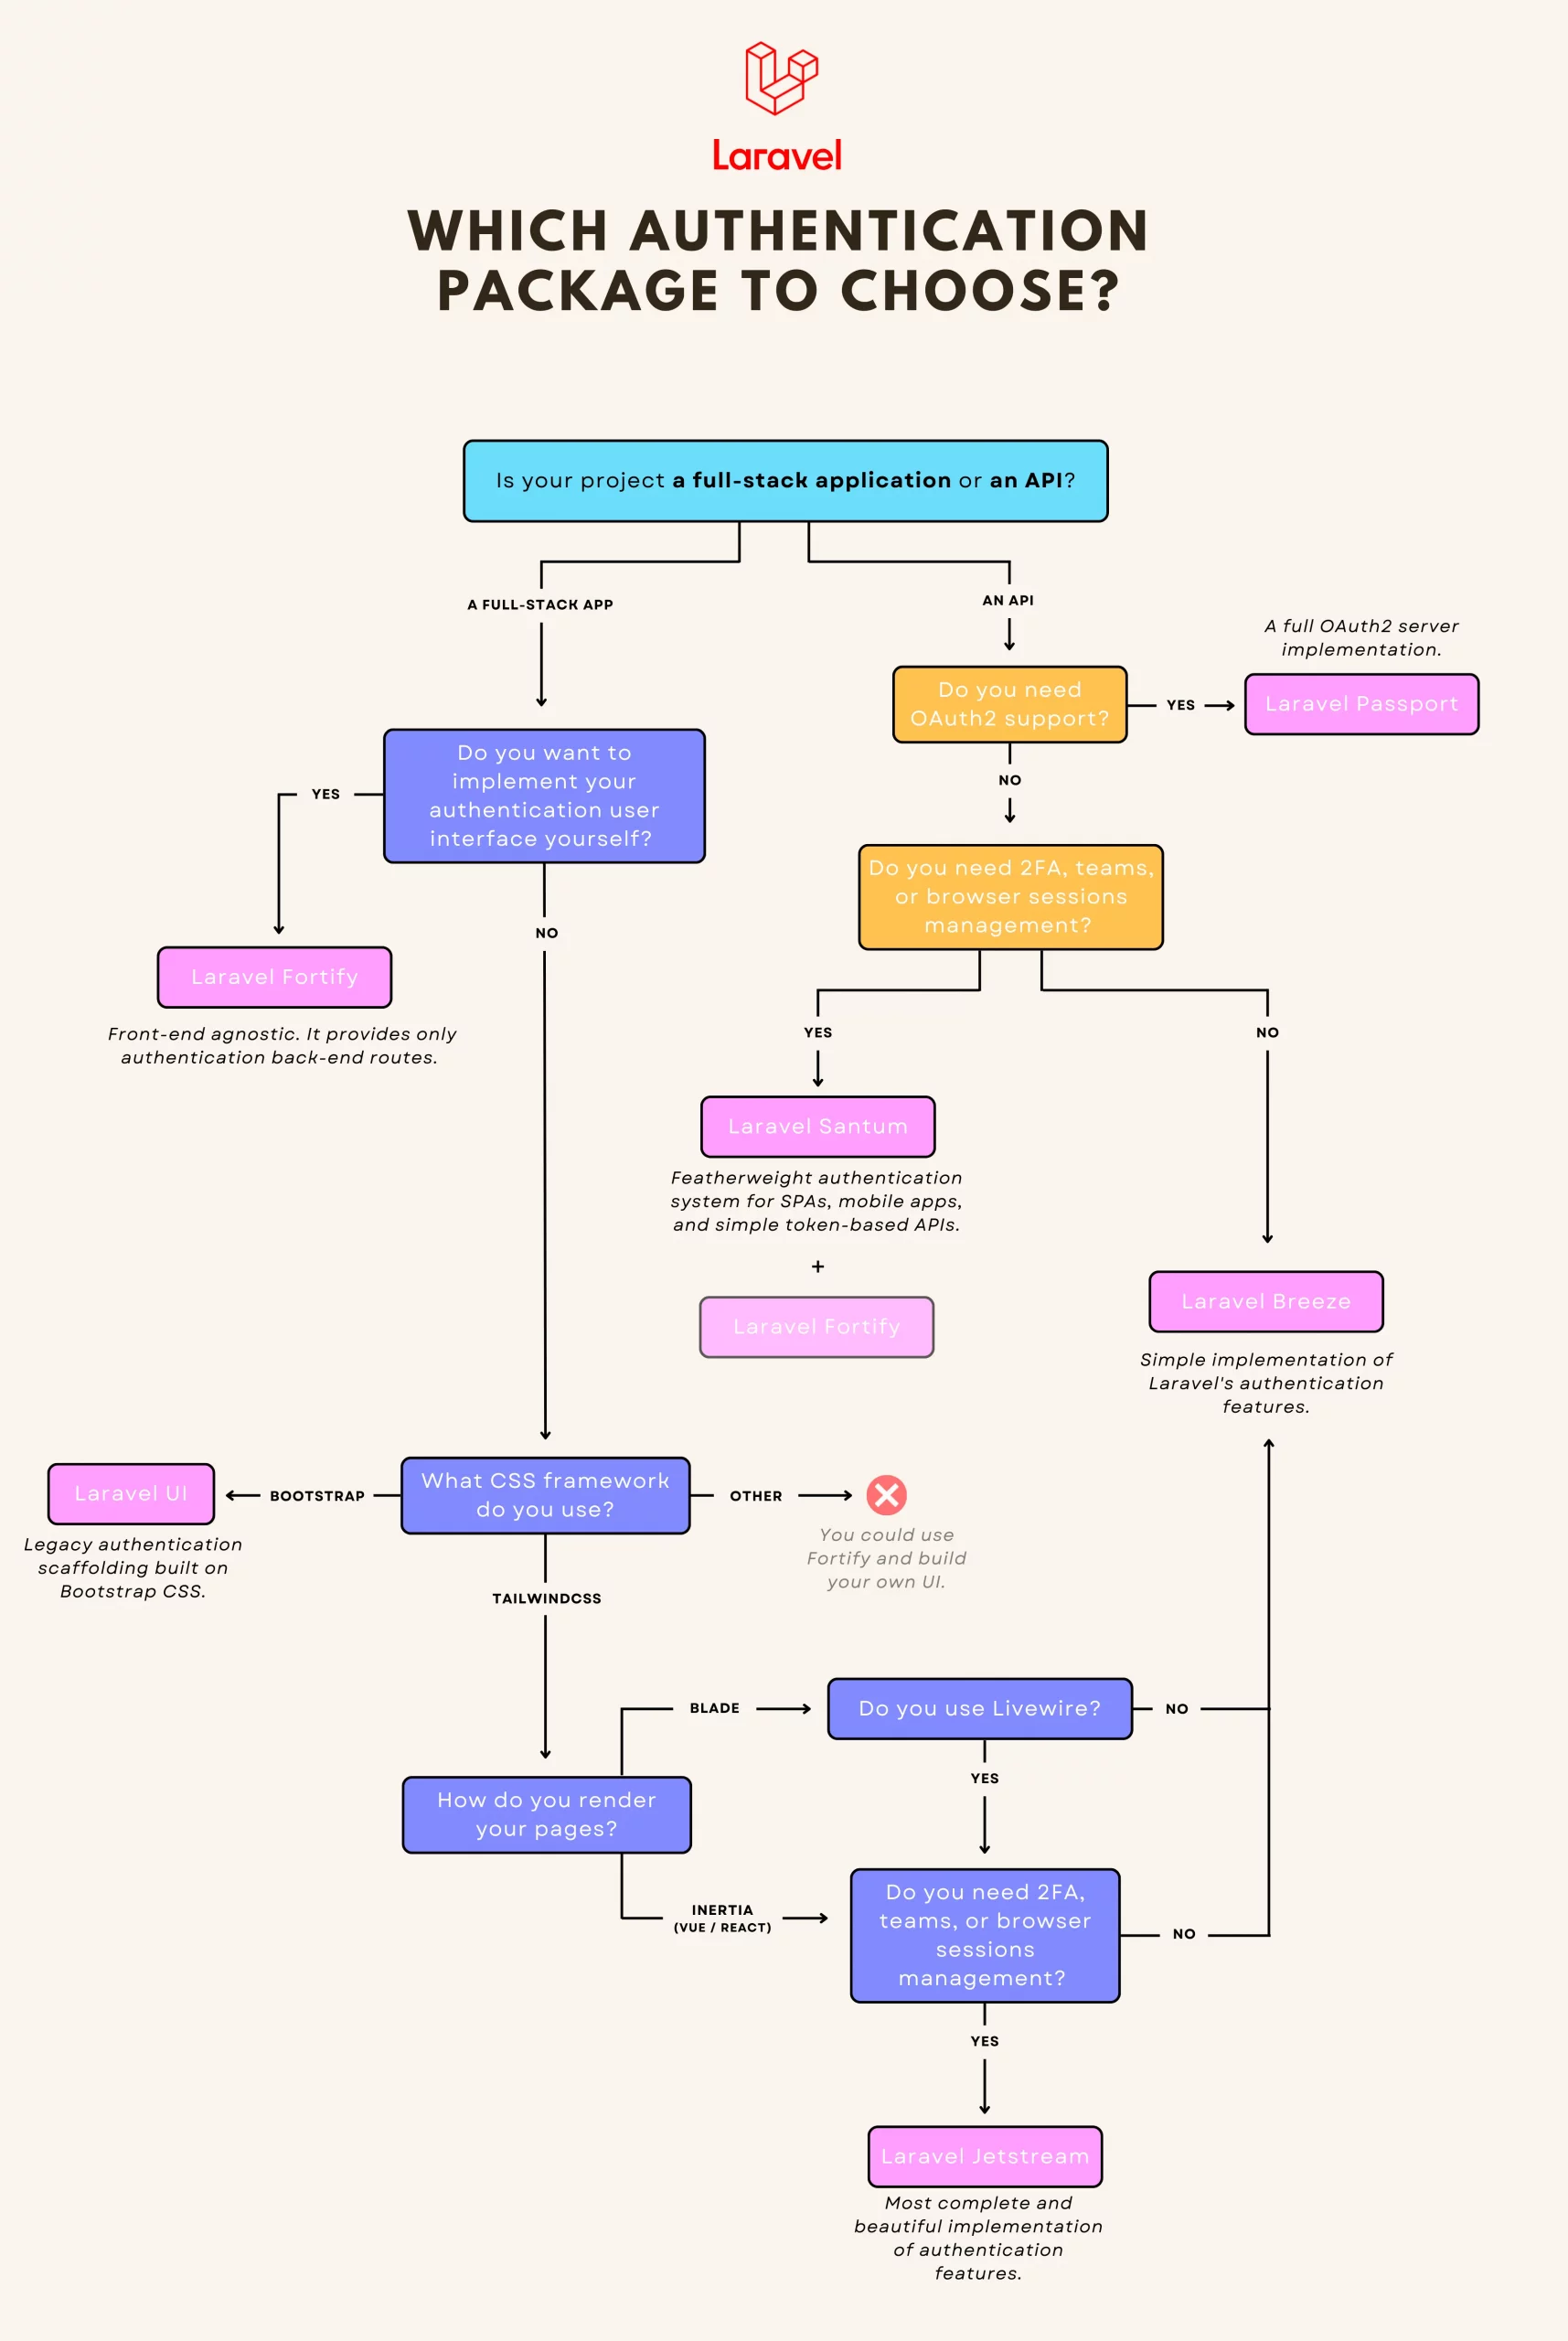
At its core, Laravel provides “guards” and “providers” to manage authentication. However, controlle ...
At its core, Laravel provides “guards” and “providers” to manage authentication. However, controlle ...
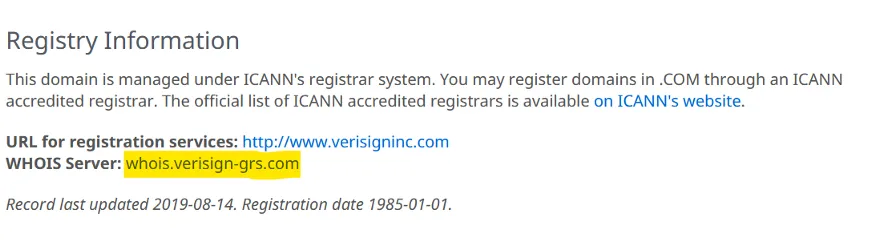
The wonderful world of Whois!, if you do not know what it is or what it is for, this is probably no ...
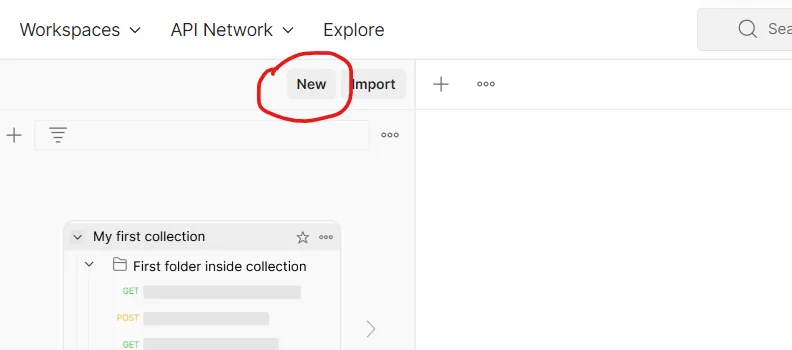
Laravel creates an Admin API from scratch – Part 2
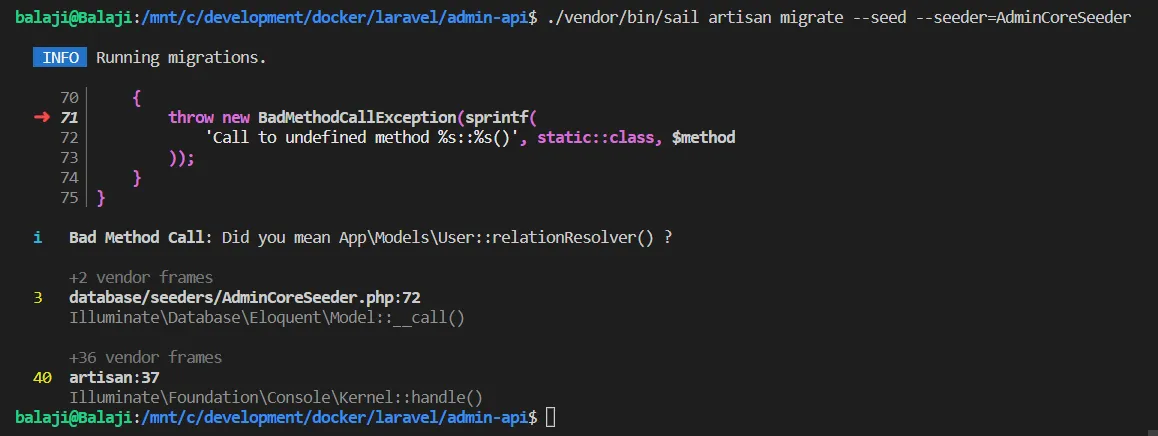
Laravel creates an Admin API from scratch — Part 3
Laravel creates an admin panel from scratch — Laravel 10 Upgrade Guide— Part 23
Pint is one the newest members of Laravel first-party packages and will help us to have more readab ...
Laravel Chunking Database Queries Result
Laravel Refactoring — Laravel creates an admin panel from scratch — Part 11

Amazon, which already charges some of the world’s lowest fees for Prime Video in India, is going a ...
Using Growpart $ growpart /dev/sda 1 CHANGED: partition=1 start=2048 old: size=39999455 end=4000 ...